Showing posts with label gosh. Show all posts

Saturday, July 13, 2013

The Painting Incident ?

Hey again ;)
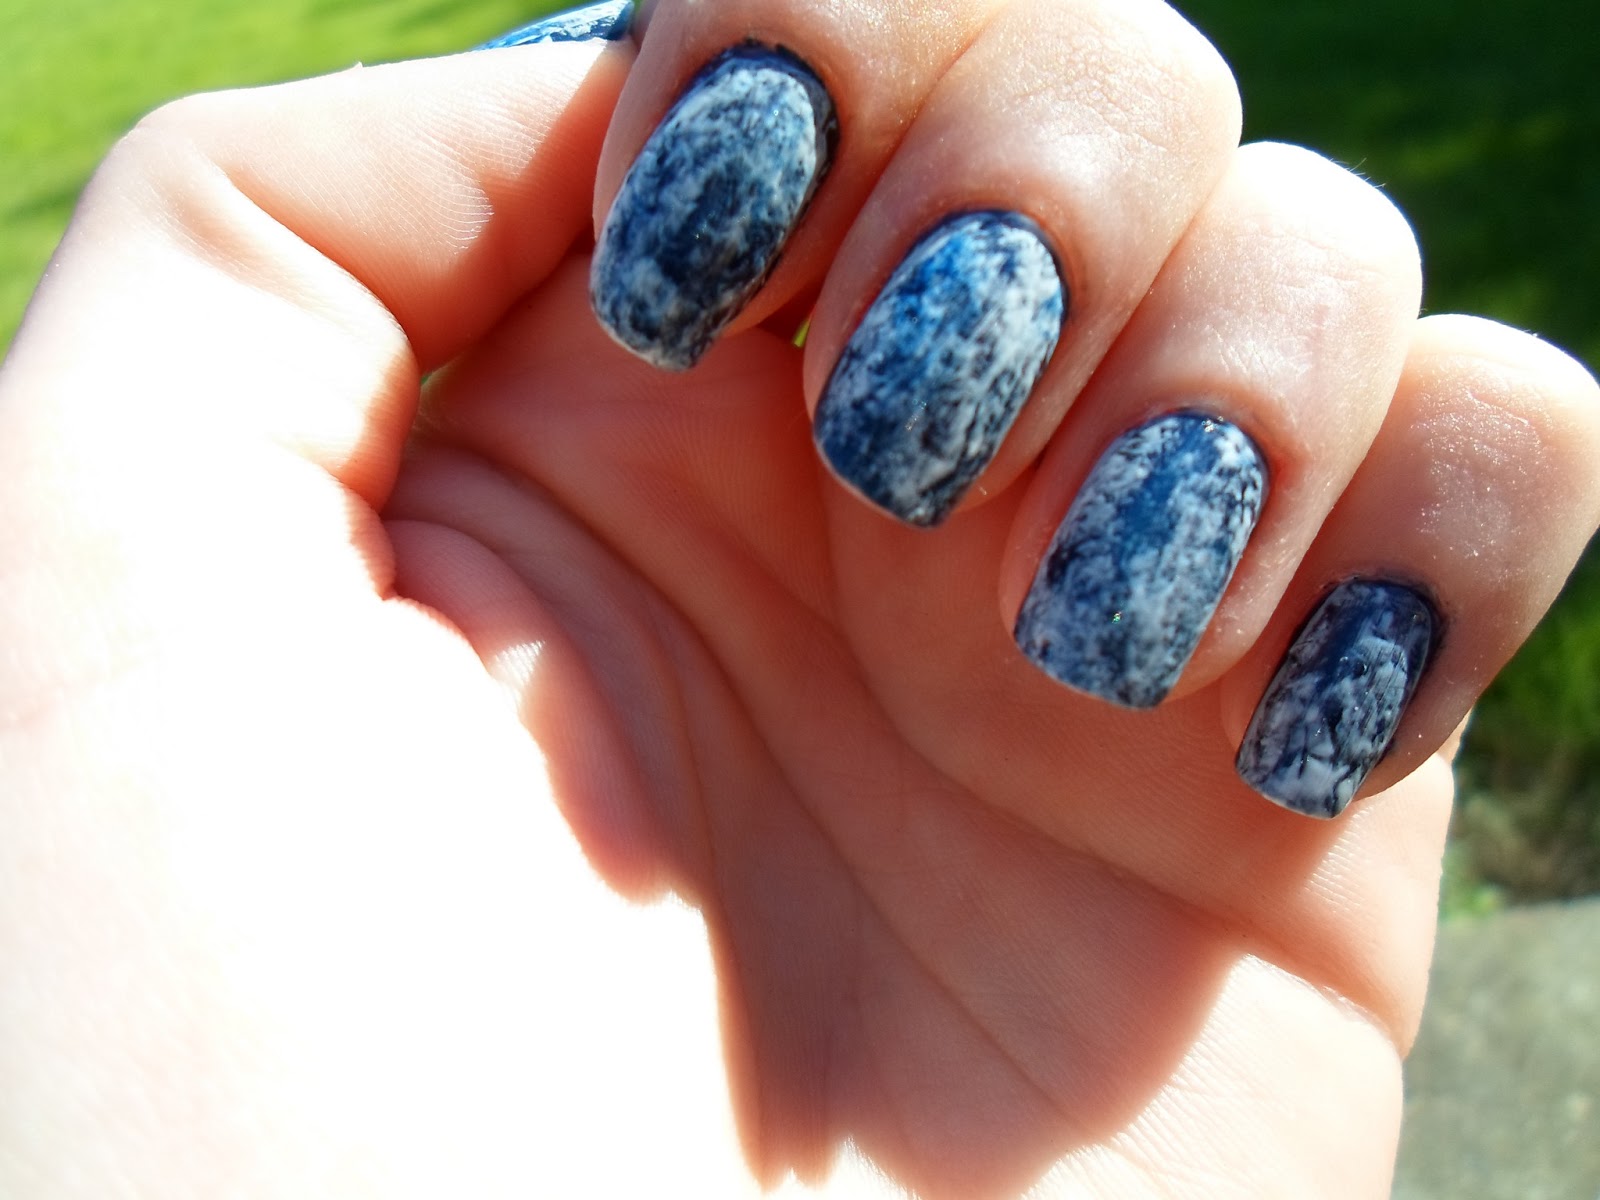
I wanted to do a plastic wrap design using 3 colors, and figured that black ,white and purple would look good together. I wanted the black to be in focus, so I only dapped on the white and purple on some of the nail. I think the end result looks like an abstract painting or something like that.


This would look great if I had a purple top to go along with it, but to my regret I found that the only purple clothing I own is a pair of purple jeans. It's too hot to wear long trousers atm though...so much useless information ;D

As you can figure I started with a coat of black polish, covering the whole nail. Then I used a piece of Saran/Plastic wrap (or in British: cling film) to dap on the white and the purple.
I really love using plastic wrap for nail designs. You can make some really cool designs with it and it's so super easy and takes no time. 
These are the products used: (links below)

That was all for today, thank you for reading! If you want to follow me on Facebook rather than here, you're welcome ;) Link to my Facebook page
 - Marie

Monday, June 17, 2013

Pink & fishtails

Hello everyone!! :)
I am attending a nailpolish challenge on The Crumpet that I became aware of on a fellow blogger's blog (Blueberrynails). It's just for fun so no prize can be won, and it's only for amateurs.
I thought it sounded fun, but since this month's theme is pink, and I'm not that much into pink I thought it wasn't for me. But I have decided to give it a try anyways!

So here is what I came up with - pink with pyramid studs and fishtails:


The pink is from GOSH, 544 Pink Lady. It's pink (obviously) and it has a subtle hint of lilac shimmer in it.
The white is from Gosh too, and the black one is from Maybelline Colorama.

Let's see some photos more closeup of each hand:


 And here is a close up of my thumb so you can see the subtle lilac shimmer...
 It's not totally visible, but it's there...
And a close.up of the fishtail on my indexfinger.
It's actually really easy to do this design, though I know my fishtails aren't perfect. I added numbers to the pictures so you can see in which order I did it.
I started with some black by the nail root, then a line of pink, a line of white, black, pink etc.  There is a lot of overlapping when you do this design, which you can see on the pink when it has to overlap the black.
The studs are just placed while the polish was still wet, and once dried finished with top coat.
I think I'm gonna have to do this design again, just with some other colors. Somehow I feel too girlygirl when I'm wearing pink on my finger nails...toenails, no problem though ;)

Here's a link to the contest where you also can see the other participants' contributions: the crumpet contest june. Voting starts tomorrow! :)

See you,
- Marie

Friday, May 31, 2013

Studded Funky Orange

This will just be a short post since I am working aaaall day today!
I decided to re-do the triangle micro bead/studded look you saw on my thumb the other day.
 I'm wearing GOSH Funky Orange. 

I got these three things above for free yesterday! Weeee... I had to buy something to get it though..
Psst, Danish viewers - If you buy 2 Max Factor products in Matas you receive this gift!

Later, Marie

Tuesday, May 28, 2013

Marble nails with plastic wrap !

Hello everyone!
So this is my first attempt with using plastic wrap/cling foil, but definitely not the last time I am doing this! There are just endless opportunities in color mixing. It's really, really easy to do this - check out my guide below the pictures! And the result is this awesome marble effect!


I used Rimmel Rhythm & Blues as base and a white Gosh on top. And top coat.

I look forward to try out this method with some other colors! 

Here's a short guide to make your own marble nails:
  • Paint your nails in your chosen color. Wait for it to dry completely. This is your base color.
  • Take some plastic wrap - a little piece is enough - crumble/curl up a bit (not sure which term is the right??) 
  • Put the nail polish you want as top color on your nails. While still wet, dab the plastic foil on the polish until you have pattern you want.
  • Finish with top coat - VOILA!! 
Below you can see the plastic foil crumbled up, ready to use!

So, let me know what you think - did I do well? :)

- Marie 

Sunday, May 19, 2013

HotMakeup - Caviar Micro Beads


Hello dear readers!
May I present for you my first attempt with caviar micro beads!! I think it turned out better than i had hoped... I thought the beads would be much more all over the place and difficult to work with, but they were very easy to deal with! I know the beads are not totally even on the nail, but that's fine with me. Me likey anyways.

These are the caviar beads I used.

On the other nails I made a classic French manicure.

All French tips are made freehand.
Here you can see it from a bigger distance.

Gosh 525 Powder, Gosh F2 Nail Tip, HotMakeup beads.
So do you like Caviar manicures, and did I do well?
I would like to do a Vlog for you, if you would like it? Just let me know :)
 
What you need:
- Nailpolish you want on your other nails, or if you're doing all your nails, polish to put under the beads.
- Caviar Beads
- Bowl, where you collect the beads that doesn't stick to your finger (you can easily put these into the container again with a tray or simply a bend piece of paper.
- Top coat.  

How I did it:
1) started up by doing the French tips.
2) put a thick layer of Gosh Powder on all my nails, except the ones where the beads should be.
3) once the other nails were done and dry, I put a thick layer of Gosh powder on (in my case) the ring finger and poured the beads on my nail over a bowl.
4) press the beads carefully so they stick a little better to the polish.
5) give them some time to dry on the polish.
6) put top coat over the beads so they don't fall off so easy. Number 5 is a little important because if you put top coat over the beads before the beads are just a little dry, you move them around with the brush from the top coat.
7) allow to dry and Voila! Caviar manicure!

- Marie


Dansk: 
Mit allerførste forsøg med Caviar perler! Det gik faktisk meget bedre end jeg havde håbet på. Troede kuglerne ville være meget mere ustyrlige, men de var faktisk ret nemme at styre! På mine andre negle har jeg lavet fransk manicure. Alle franske tipper er lavet i frihånd.

Hvad du skal bruge:
- neglelak, til at putte på dine andre negle og/eller under dine caviar kugler.
- Caviar kugler.
- Skål, hvori du samler de kugler der ikke klistrer til din negl. Disse kan nemt fyldes i glasset igen, enten med en lille tragt eller et foldet stykke papir.
- Top coat
Fremgangsmåde:
1) Start med at lakere de negle der ikke skal have caviar kugler på.
2) Put et tykt lag neglelak på der hvor kuglerne skal være
3) Hæld kuglerne ud over din negl ovenover skålen
4) Pres forsigtigt kuglerne lidt ned i neglelakken så de hænger bedre fast
5) Giv dem lidt tid til at tørre
6) Påfør top coat. Punkt 5 er vigtigt for hvis ikke kuglerne er tørret en lille smule ind på lakken, flytter de sig rundt når du rører dem med børsten fra din top coat.
7) Lad det tørre og Voila! Caviar Manicure!

Hvis I har lyst vil jeg gerne lave en video til jer med fremgangsmåde, bare lad mig vide det :)
- Marie

Friday, May 17, 2013

Gosh Ocean

Hello everybody!
Today's swatch is Gosh Ocean! A beautiful turquoise blue/green polish. Actually, it was a bit dumb because first time I saw it in the local beauty store, where there was a Gosh sale with everything on half price. But I was also buying some other polishes, and thought to myself that I was already spending too much money in there that day, so I left. Without Ocean. But I couldn't stop thinking about it so at last after some days I had to go buy it another place. Full price though. Dumb. But now it's mine. Mine. Miiiiineeee!!!


Today was the warmest day so far in Denmark this year, so I took some of the pictures outside. The green grass and Ocean compliments eachother very well, I think. I really regret I recently cut my nails short though :(  I used two coats.


You like?  :)
- Marie

Dansk: Idag swatcher jeg Gosh Ocean! En rigtig flot turkis blågrøn lak. Jeg så den første gang i Matas hvor der var halv pris på alt Gosh fordi de ville stoppe med at sælge Gosh derinde. Jeg ville først købe den, men syntes så alligevel at jeg var i færd med at bruge for mange penge derinde, for skulle også have nogle andre lakker! Så jeg købte den ikke. Men det fortrød jeg og måtte så efter nogle dage ud og købe den, bare i en anden Matas til fuld pris. Men nu er den endelig min! Idag har vejret jo været skønt, så tog nogle af billederne udenfor. Synes den grønne baggrund klæder Ocean rigtig godt. Der er brugt 2 lag. Kan I lide den? :)